PGGB Settings
Contents
DAC Selection
For those considering PGGB, it’s essential to pair it with a DAC that shines in PCM playback. Although PGGB is capable of processing an extensive range of files, including DSD512, it ultimately converts everything to PCM. Therefore, the optimal experience with PGGB is achieved with DACs capable of supporting high PCM sampling rates, with some modern DACs even accommodating up to 1,536kHz PCM files. To ensure the purest sound, look for a DAC that offers a Non-Oversampling (NOS) mode or the ability to bypass digital filters, as this will prevent any additional processing from altering the meticulously upscaled PGGB files. For example, the Chord DACs will skip the internal WTA1 filter stage when presented with 16FS (705.6/768 kHz).
Here’s a list of DACs from PGGB:
- Chord DACs DAVE, Hugo TT2, Qutest and Hugo2, Mojo, Mojo 2 (16fS*/32 bits or 24 bits using DBNC/SRC.DX )
- T+A SD 3100 HV, SDV 3100 HV, DAC 200 (16fS/32bits with NOS2 – no oversampling mode)
- Denafrips Terminator-Plus, Terminator (32fS/20bits**)
- Holo Audio May DAC (16fS/20bits** or 32fS/20bits** or 32fS/16bits***)
- MSB Select/Reference with Pro ISL (16fS/32 bits) and the Digital Director
- Vinnie Rossie L2 DAC in NOS mode (16fS/32 bits)
- iFi Pro iDSD (16fS/32 bits)
- dCS Vivaldi: On CDs remastered to DXD rates (8fS/24 bits)
- Gustard X26 Pro based on ESS 9038 Pro in NOS mode (16fS/32 bits)
- Ayre QX-5 Twenty USB2 Upgrade in NOS mode (16fS/32 bits)
- Topping D90, D50 (16fS/32 bits)
Chord Electronics DAVE vs TT2
Before I get into the details, the DACs I used were the Chord Electronics Hugo TT2 and DAVE. Both max out at 705.6/768 kHz. As to which one was better for PGGB, I don’t think the answer is as obvious as you’d think. I’ve been asked on numerous occasions how much better the DAVE is when compared to the TT2, and I just want to set the record straight.
The Chord Electronics DAVE is known for its transparent approach to sound, delivering an exceptionally clear and detailed listening experience. There’s more perceived depth and “realism.” In contrast, the TT2 is characterized by a meatier sound that some listeners might find more subjectively enjoyable (including myself). While the TT2 impresses with its tonal weight and musical richness, the DAVE stands out for its technical performance, offering superior detail, clarity, and separation. Essentially, the DAVE is lauded for its purity in sound reproduction, whereas the TT2 is favored for its emphasis on weight and musicality, making each appealing based on individual listening preferences.
Although the DAVE has more lifelike qualities, I preferred the TT2’s musicality for most of my listening. Although it doesn’t have the resolve of the DAVE, I just found myself always going back to the TT2 for long-term listening. The DAVE sounds more like you’re sitting with them at the microphone while the TT2 feels more like an intimate concert. With PGGB, although the DAVE does benefit heavily from the upscaled files, I’ve found the warmth of the TT2 combined with the resolution of the upscaled files provided a palpable balance.
What sounds natural?
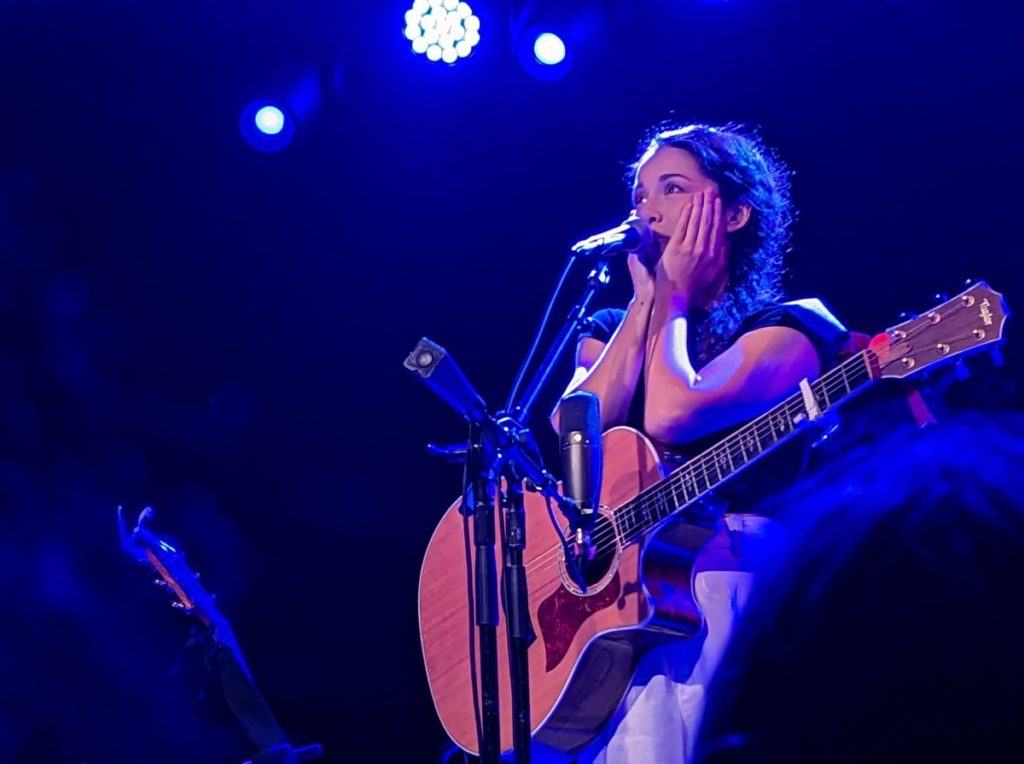
A few months ago, I had the opportunity to attend an intimate concert by Kina Grannis. Standing just a few feet away, I was deeply moved by the emotional depth of her performance. She sang several songs from her album “It’s Hard To Be Human,” which poignantly explores her personal struggles with infertility. The experience was surprisingly touching and memorable. When I got back home, I immediately played a few tracks from her set list, and although the DAVE was more lifelike from a spatial and resolution perspective, I felt the Hugo TT2 had qualities that reminded me of how I felt during the actual live performance. So which DAC you decide on really depends on what you value more when you listen to music. If it’s believability and detail, go with the DAVE. If it’s natural warmth and body, go with the TT2.
Storage Space
Upsampling an average album will realistically require 16 – 20GB of storage, allowing for approximately 100 albums on a 2TB SSD. Utilizing wavpack compression, a feature provided by PGGB, this can reduce the file size by roughly 25 – 30%. Luckily, storage is cheap these days. But damn, these files are far from tiny. I’d also like to mention, the type of hard drive (HDD, SSD) you use to store your media does change the sound. But that’s a dissertation for another day.
System Requirements
PGGB, designed for high-fidelity audio upscaling, requires a 64-bit Windows 10 PC or a Mac with Mojave or higher. For optimal performance, a system with 32GB of RAM and an 8-core processor is recommended, though smaller libraries with shorter tracks might manage with 16GB RAM and a 4-core processor. The use of SSDs for both virtual memory (minimum 128GB) and storage enhances processing speed. PGGB efficiently utilizes all available CPU cores, adjusting to the system’s memory capacity, but demands adequate cooling to handle potential heat, especially in overclocked or turbo-mode scenarios. It’s also compatible with Linux via a Windows-running virtual machine, provided it’s allocated sufficient RAM and CPU resources. Note that memory needs escalate with higher precision settings, potentially requiring up to 64GB of RAM for extensive processing tasks.
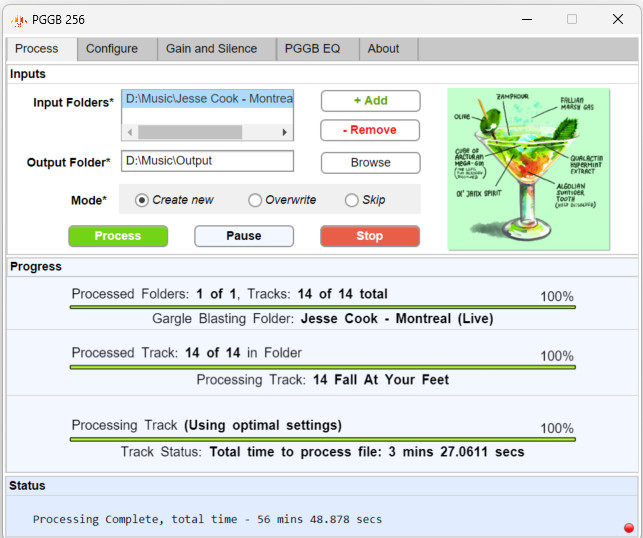
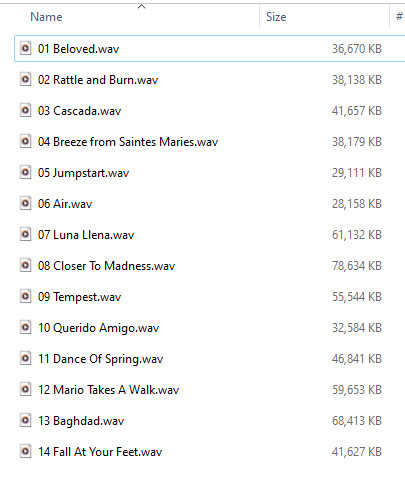
On my AMD Threadripper, each track took about 4 minutes to convert to 705.6/768 kHz @ 32 bits, Ludicrous mode. For WAV files, this album was originally 640 MB and the after processing 20GB. That’s 32X the original with no compression.

Choose Your Flavor
PGGB empowers you to generate multiple versions of your tracks or albums. Depending on what settings you select, you could adjust settings to fit your personal taste in your recordings.
Generally, the higher the sampling rate, the smoother the sound. For those of you (like myself) who enjoy a warmer sound:
PGGB maintains fidelity to the original audio without introducing additional coloration, though it may initially feel less warm due to its precise separation of lower frequencies and enhanced timing. This increased accuracy in reconstructing the audio’s leading edges might lead to a perceived reduction in fullness.
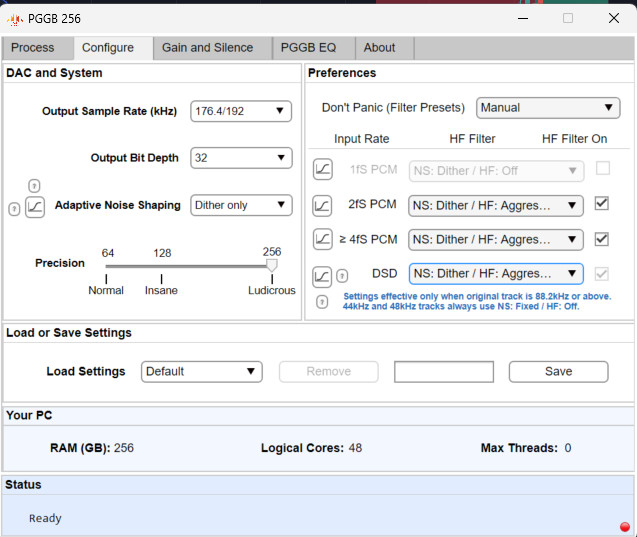
These are the “warm” settings. For an output sampling rate of 176.4/192:
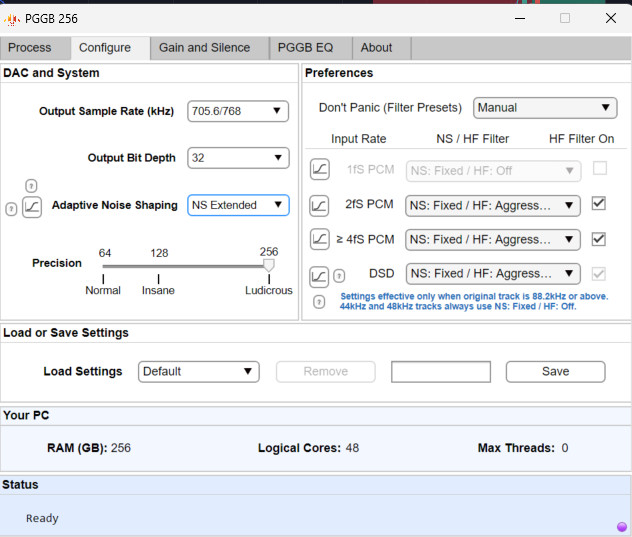
And for 352.8/384 and 705.6/768 sampling rates:
Subjective impact
Here’s a quick guide to what might work for you. I tried every permutation (outside of using EQ) and to be honest, it really came down to the recording itself. There were a few times the “non-warm” variant actually sounded warmer and fuller than their “standard” variant.
These aren’t hard rules, so just experiment. That said, if you enjoy what PGGB does, you’ll most likely just stick to its maximum sample rate, precision, and bit depth.
| Sampling Rate | Impressions |
|---|---|
| Original (e.g., 44.1 kHz) | With no upscaling, it will be warmer and richer sounding. Perhaps even a heftier low-end on some recordings. But it pretty much lacks everything that enhances transparency (delineation, soundstage, micro-details, etc). |
| 705.6/768 vs 705.6/768 Warm | The warm version might be slightly grainy and rough in the upper mids, while the standard 705.6/768 offers a smoother presentation. |
| 352.8/384 vs 352.8/384 Warm | Warm version presents more forward and warmer vocals, providing a balance of soul, clarity, and smoothness. The standard is cleaner, more cohesive, and higher resolution. |
| 176.4/192 vs 176.4/192 Warm | High-resolution riffs and distinct low-end layers are noted in the standard version. The warm version is flatter, leaner, and not as deep. But might be more “musical” depending on the recording. |
There’s a lot more detail on their webpage regarding how to best use PGGB.


Recent Comments